

Node.js Transcription API: A Developer’s Complete Guide
The fastest, safest way to add speech-to-text in Node.js is to implement a server-side transcription pattern that uploads preprocessed audio or connects a streaming socket to a hosted transcription API while keeping API keys strictly server-side. Two implementation paths cover the majority of production use cases: file-based upload (batch jobs, podcast processing, recorded calls) and real-time streaming (live captions, call-center monitoring, voice assistants). A minimal file-upload request looks like this:
const form = new FormData();
form.append('file', fs.createReadStream('./audio.wav'));
form.append('model', 'whisper-large-v3');
const res = await fetch('https://api.opentranscription.io/v1/transcribe', {
  method: 'POST',
  headers: { Authorization: `Bearer ${process.env.TRANSCRIPTION_API_KEY}` },
  body: form,
});
const { text, words } = await res.json();
Choose file upload when audio already exists on disk or arrives via webhook. Choose streaming when your application needs partial transcripts within one to two seconds of speech.
Key Takeaways
A server-side Node.js integration that preprocesses audio, manages API keys via environment variables, and selects models by WER, latency, and cost is the most reliable path to production-grade speech-to-text.
| Point | Details |
|---|---|
| Keep keys server-side | Store API keys in env vars or a secrets manager; generate short-lived tokens for browser streaming. |
| Preprocess audio first | Normalize to 16 kHz mono WAV with ffmpeg before every API call to maximize accuracy. |
| Match pattern to use case | Use file upload for batch jobs; use WebSocket streaming for live captions under two seconds latency. |
| Chunk long recordings | Split into 10–15 minute segments with 5–10 second overlap and offset timestamps before merging. |
| OpenTranscription model catalog | Filter 40+ models by WER, latency, and cost per second before committing to a production model. |
Table of Contents
- What do you need before writing a node transcription API integration?
- How to install the SDK and configure credentials securely
- How to transcribe an audio file with Node.js
- How do you implement real-time streaming transcription in Node.js?
- How does speaker diarization work, and what are its limits?
- Audio preprocessing checklist: formats, sample rates, and ffmpeg commands
- Strategies for handling long recordings without hitting timeouts
- How should you handle polling, errors, and rate limits in production?
- Production deployment checklist: security, cost, and monitoring
- How do you choose the right transcription model for your use case?
- What can you do with transcripts after you get them?
- Why hosted APIs outperform local models for most production workloads
- OpenTranscription covers every pattern in this guide
- Sources
- FAQ
What do you need before writing a node transcription API integration?
Before any code runs, confirm the following are in place:
- Node.js LTS (v20 or v22 as of 2026) installed from the official Node.js download page. Match your CI and production environments to the same LTS minor version to avoid runtime mismatches.
- npm (bundled with Node) or Yarn for package management.
- ffmpeg installed system-wide for audio normalization. On macOS:
brew install ffmpeg. On Ubuntu/Debian:sudo apt-get install ffmpeg. On Windows: download from ffmpeg.org and add toPATH. - A transcription API key from your chosen provider. OpenTranscription issues keys from the account dashboard; store the key in an environment variable, never in source code.
- dotenv (
npm install dotenv) for local.envfile loading during development. - Optional: local model bindings such as
@valoric/whisper-nodeif offline or on-premises transcription is required. These support JSON, SRT, and VTT outputs with word-level timestamps but impose input format constraints (typically 16 kHz WAV).
Pro Tip: Use Nodejs as your single source of truth for supported versions and binary installers. Platform-specific package managers (Homebrew, apt) sometimes lag behind the official LTS release by days or weeks.
How to install the SDK and configure credentials securely
Install the OpenTranscription SDK and the dotenv utility:
npm install @opentranscription/sdk dotenv
# or
yarn add @opentranscription/sdk dotenv
Create a .env file at the project root:
TRANSCRIPTION_API_KEY=ot_live_xxxxxxxxxxxx
Load it at the entry point of your application:
import 'dotenv/config';
import { OpenTranscription } from '@opentranscription/sdk';

const client = new OpenTranscription({
  apiKey: process.env.TRANSCRIPTION_API_KEY,
});
For browser-facing streaming features, never embed the API key in client-side JavaScript. Instead, generate a short-lived token from a secure Node.js endpoint and pass that token to the browser. The token should carry a short TTL (60–300 seconds) and be scoped to a single session.
- Add
.envto.gitignoreimmediately. - In production, use a secrets manager (AWS Secrets Manager, HashiCorp Vault, or GCP Secret Manager) rather than a flat
.envfile. - Rotate keys on a schedule and revoke any key that appears in a commit history.
Pro Tip: Process managers like PM2 and container orchestrators like Kubernetes both support injecting environment variables at runtime without touching the filesystem, which is the preferred pattern for containerized Node.js services.
How to transcribe an audio file with Node.js
The following Express route accepts a file upload, forwards it to the transcription API, and returns structured results:
import express from 'express';
import multer from 'multer';
import { OpenTranscription } from '@opentranscription/sdk';
import 'dotenv/config';

const app = express();
const upload = multer({ dest: '/tmp/uploads/' });
const client = new OpenTranscription({ apiKey: process.env.TRANSCRIPTION_API_KEY });

app.post('/transcribe', upload.single('audio'), async (req, res) => {
  try {
    const result = await client.transcribe({
      file: req.file.path,
      model: 'whisper-large-v3',
      language: 'en',
      response_format: 'json',
      timestamp_granularities: ['word', 'segment'],
    });
    res.json({
      text: result.text,
      words: result.words,
      segments: result.segments,
    });
  } catch (err) {
    res.status(err.status ?? 500).json({ error: err.message });
  }
});
Key request parameters
| Parameter | Values | When to use |
|---|---|---|
response_format |
json |
Default; returns full word/segment objects with timestamps and confidence scores. |
response_format |
text |
Plain string only; use for simple display or downstream NLP. |
response_format |
srt |
Numbered subtitle blocks with timecodes; use for video captioning. |
response_format |
vtt |
WebVTT format; use for HTML5 <track> elements. |
timestamp_granularities |
word, segment |
Request both when you need word-level alignment for karaoke or search indexing. |
language |
BCP-47 code (e.g., en, es) |
Specify to improve accuracy; omit to trigger auto-detection. |
A minimal parsed output from a json response:
const plainText = result.text;
const wordTimestamps = result.words.map(w => ({
  word: w.word,
  start: w.start,
  end: w.end,
  confidence: w.confidence,
}));
Pro Tip: Request timestamp_granularities: ['word'] even when you only need plain text today. Word-level timestamps cost nothing extra on most APIs and enable search indexing, highlight sync, and SRT generation later without re-transcribing.
How do you implement real-time streaming transcription in Node.js?
Real-time transcription follows a three-tier architecture: the browser captures microphone audio via the Web Audio API (getUserMedia → AudioWorkletNode), streams PCM frames over a WebSocket to a Node.js broker, and the broker forwards those frames to the transcription service’s streaming endpoint.
- Browser side: capture audio with
getUserMedia, encode to PCM 16-bit at 16 kHz using anAudioWorkletProcessor, and send binary frames over a WebSocket to your Node server. - Node broker: accept the WebSocket connection, authenticate the session using a short-lived token, and open a second WebSocket to the transcription API.
- Transcription service: returns partial (
is_final: false) and final (is_final: true) transcript segments, which the broker relays back to the browser. - Reconnection: implement exponential backoff on the upstream WebSocket. If the connection drops, buffer incoming audio frames in a queue and replay them after reconnect to avoid gaps.
import WebSocket from 'ws';

function openTranscriptionStream(onPartial, onFinal) {
  const ws = new WebSocket('wss://stream.opentranscription.io/v1/stream', {
    headers: { Authorization: `Bearer ${process.env.TRANSCRIPTION_API_KEY}` },
  });

  ws.on('message', (data) => {
    const msg = JSON.parse(data);
    if (msg.is_final) onFinal(msg.text);
    else onPartial(msg.text);
  });

  ws.on('close', (code) => {
    if (code !== 1000) setTimeout(() => openTranscriptionStream(onPartial, onFinal), 2000);
  });

  return ws;
}
Pro Tip: Apply backpressure on the Node broker by checking ws.bufferedAmount before forwarding each audio frame. If the buffer exceeds a threshold (e.g., 64 KB), drop or downsample frames rather than queuing indefinitely, which would cause latency to compound over a long session.
Server-side brokering adds one network hop but keeps API keys off the client and lets you log, filter, or redact PII before audio reaches the transcription service. Direct browser-to-API streaming with short-lived tokens is viable for low-latency requirements where that extra hop matters, provided token issuance and revocation are handled server-side.
How does speaker diarization work, and what are its limits?
Speaker diarization assigns a speaker label to each transcript segment. Request it by setting diarize: true (and optionally num_speakers) in the transcription request body.
A diarized JSON response segment looks like this:
{
  "speaker": "SPEAKER_01",
  "start": 4.12,
  "end": 7.85,
  "text": "The quarterly numbers look strong.",
  "words": [
    { "word": "The", "start": 4.12, "end": 4.22, "speaker": "SPEAKER_01" }
  ]
}
- Set
num_speakerswhen you know the exact count; it improves label consistency. - Pass
known_speaker_names(an array of strings) if the API supports it, so labels map to real names rather thanSPEAKER_01,SPEAKER_02. - Diarization accuracy degrades when speakers overlap, when audio quality is poor, or when more than eight speakers are present in a single recording.
- For long recordings, diarization runs as a second pass after transcription; word-level timestamps and diarization labels are aligned post-hoc, so minor boundary drift (±100 ms) is normal.
| Scenario | Recommended approach |
|---|---|
| 2–4 speakers, clean audio | Set diarize: true, omit num_speakers |
| Known speaker count | Set diarize: true, num_speakers: N |
| Named speakers required | Pass known_speaker_names array |
| 8+ speakers or overlapping speech | Run diarization on shorter chunks; merge labels manually |
Audio preprocessing checklist: formats, sample rates, and ffmpeg commands
MDN’s audio format documentation recommends normalizing audio to compatible sample rates and codecs before sending to any transcription API. The baseline target for most speech recognition models is 16 kHz mono PCM WAV. Some models accept 48 kHz stereo, but sending stereo when mono is expected doubles payload size without accuracy benefit.
Key ffmpeg commands:
# Convert any input to 16 kHz mono WAV
ffmpeg -i input.mp4 -ar 16000 -ac 1 -f wav output.wav

# Extract audio from MP4 and normalize
ffmpeg -i recording.mp4 -vn -ar 16000 -ac 1 output.wav

# Trim silence with VAD filter before sending short clips
ffmpeg -i input.wav -af silenceremove=start_periods=1:start_silence=0.3:start_threshold=-50dB output.wav
| Format | Lossless | Notes |
|---|---|---|
| WAV (PCM) | Yes | Preferred; no decoding overhead on the API side. |
| FLAC | Yes | Smaller than WAV; good for archival and batch upload. |
| MP3 | No | Widely supported; high bitrate for acceptable accuracy. |
| M4A / AAC | No | Common from mobile devices; convert to WAV for best results. |
| WebM (Opus) | No | Native browser streaming format; most APIs accept it directly. |
Pro Tip: Run server-side voice activity detection (VAD) using the silenceremove filter or a dedicated library before sending clips shorter than five seconds. Sending silence wastes API quota and can confuse models that expect speech-dominant audio.
Strategies for handling long recordings without hitting timeouts
Most transcription APIs impose a file size limit (commonly 500 MB to 2 GB) and a per-request duration cap. For multi-hour recordings, chunking is the standard mitigation.
- Chunk by time window: split audio into 10–15 minute segments with a 5–10 second overlap at each boundary. The overlap prevents word truncation at chunk edges.
- Preserve timestamps: offset each chunk’s word timestamps by the chunk’s start time before merging. If chunk 2 starts at 600 seconds, add 600 to every
startandendvalue in its response. - Resumable uploads: for files over 100 MB, use multipart or resumable upload endpoints. Send a
POSTto initiate the upload session, receive an upload URL, thenPUTchunks sequentially. Store the upload session ID so you can resume after a network failure. - Server-side VAD before chunking: strip silence first, then chunk. This reduces total audio duration sent to the API and lowers cost proportionally.
Reassembly considerations:
- Deduplicate words that appear in the overlap window by comparing
starttimestamps across adjacent chunks. - Track job IDs per chunk and store results in a database keyed by
(recording_id, chunk_index)for idempotent merges. - If a chunk fails, retry only that chunk rather than the entire recording.
For long-form model selection, the Google Cloud Speech-to-Text latest_long model profile offers useful context on how long-audio models differ architecturally from short-clip models.
How should you handle polling, errors, and rate limits in production?
Short clips (under 60 seconds) can use a synchronous API call that returns the transcript in the HTTP response body. Longer jobs typically return a job_id and require polling.
async function pollForResult(jobId, maxAttempts = 20) {
  let delay = 1000;
  for (let attempt = 0; attempt < maxAttempts; attempt++) {
    const res = await fetch(`https://api.opentranscription.io/v1/jobs/${jobId}`, {
      headers: { Authorization: `Bearer ${process.env.TRANSCRIPTION_API_KEY}` },
    });
    const job = await res.json();
    if (job.status === 'completed') return job.result;
    if (job.status === 'failed') throw new Error(job.error);
    await new Promise(r => setTimeout(r, delay));
    delay = Math.min(delay * 2 + Math.random() * 500, 30000); // exponential backoff + jitter
  }
  throw new Error('Polling timeout exceeded');
}
| HTTP status | Meaning | Recommended action |
|---|---|---|
| 401 | Invalid or expired API key | Rotate key; check env var binding |
| 413 | Payload too large | Chunk the file; use resumable upload |
| 415 | Unsupported audio format | Convert with ffmpeg before retry |
| 429 | Rate limit exceeded | Back off with jitter; implement queue |
| 500 | Service error | Retry with exponential backoff; alert on sustained failures |
- Always store
job_idin a persistent store before polling begins so you can resume after a process restart. - Surface job status to end users via a progress indicator rather than blocking the HTTP response.
- Treat 429 responses as a signal to implement a token-bucket queue rather than a simple sleep-and-retry loop.
Production deployment checklist: security, cost, and monitoring
Security
- Store API keys in a secrets manager; never in
.envfiles committed to version control. - Generate short-lived tokens (TTL 60–300 seconds) for any browser-side streaming session, and log every token issuance event for auditing.
- Redact PII (names, phone numbers, account numbers) from transcripts before writing to any persistent store.
Cost controls
- Set per-second or per-minute quotas at the account level and configure budget alerts at 80% of the monthly threshold.
- Batch short clips into a single request where the API supports multi-file jobs; this reduces per-request overhead.
- Apply server-side VAD before submission to avoid billing for silence.
Monitoring metrics to track
- Transcription latency: p50 and p99 from request submission to first word returned.
- Success rate: percentage of jobs completing without error, tracked per model.
- Error rate by type: separate 4xx (client errors) from 5xx (service errors) to distinguish configuration bugs from provider outages.
- Cost per audio minute: calculate from billing API or webhook events and alert when it deviates more than 20% from baseline.
Privacy
Follow your organization’s data retention policy. Most transcription APIs offer a data deletion option after job completion; enable it for any audio containing personal health information or financial data.
How do you choose the right transcription model for your use case?
Model selection reduces to three variables: latency tolerance, accuracy threshold (measured as word error rate, or WER), and cost per audio second. Run the following benchmark recipe before committing to a model in production:
- Assemble a representative sample dataset: 30–60 minutes of audio that matches your production distribution (accents, noise levels, domain vocabulary).
- Submit the sample to each candidate model and record wall-clock latency from request to final transcript.
- Calculate WER by comparing the transcript against a human-verified reference using a library like
word-error-rateon npm. - Calculate cost per audio minute from the provider’s per-second billing rate.
| Scenario | Priority | Recommended model tier |
|---|---|---|
| Live captions, call center | Low latency (<1 s), moderate WER | Streaming-optimized small model |
| Podcast / video captioning | Moderate latency, low WER | Large batch model (e.g., Whisper large-v3) |
| Medical / legal transcription | Lowest WER, latency flexible | Domain-adapted large model |
| High-volume batch, cost-sensitive | Lowest cost per minute | Small or medium distilled model |
OpenTranscription’s model catalog publishes benchmark data across 40+ models, covering WER, latency, and cost per second, so you can filter by these three axes without running your own full benchmark from scratch. For a detailed comparison of Whisper-based options specifically, the ClipForge guide to Whisper transcription tools covers when to prefer local versus hosted deployments.
What can you do with transcripts after you get them?
Converting a JSON transcript to SRT is a common first downstream step:
function toSRT(words) {
  return words.map((w, i) => {
    const fmt = s => new Date(s * 1000).toISOString().slice(11, 23).replace('.', ',');
    return `${i + 1}
${fmt(w.start)} --> ${fmt(w.end)}
${w.word}
`;
  }).join('
');
}
For segment-level SRT (more readable than word-level), group words into segments by segment_id before formatting.
Beyond subtitles, structured transcripts enable several downstream workflows:
- Automatic chaptering: cluster segments by topic using an embedding model, then generate chapter markers with timestamps.
- Named-entity extraction: pass
result.textto a NLP library (spaCy via a Python microservice, or a JavaScript NLP library) to extract people, organizations, and locations. - Search indexing: store word-level timestamps in Elasticsearch or OpenSearch so users can jump to the exact moment a term is spoken.
- Content repurposing: convert transcripts into short-form clips or social posts; the ClipForge guide on monetizing existing content covers practical workflows for turning transcripts into repurposed assets.
Why hosted APIs outperform local models for most production workloads
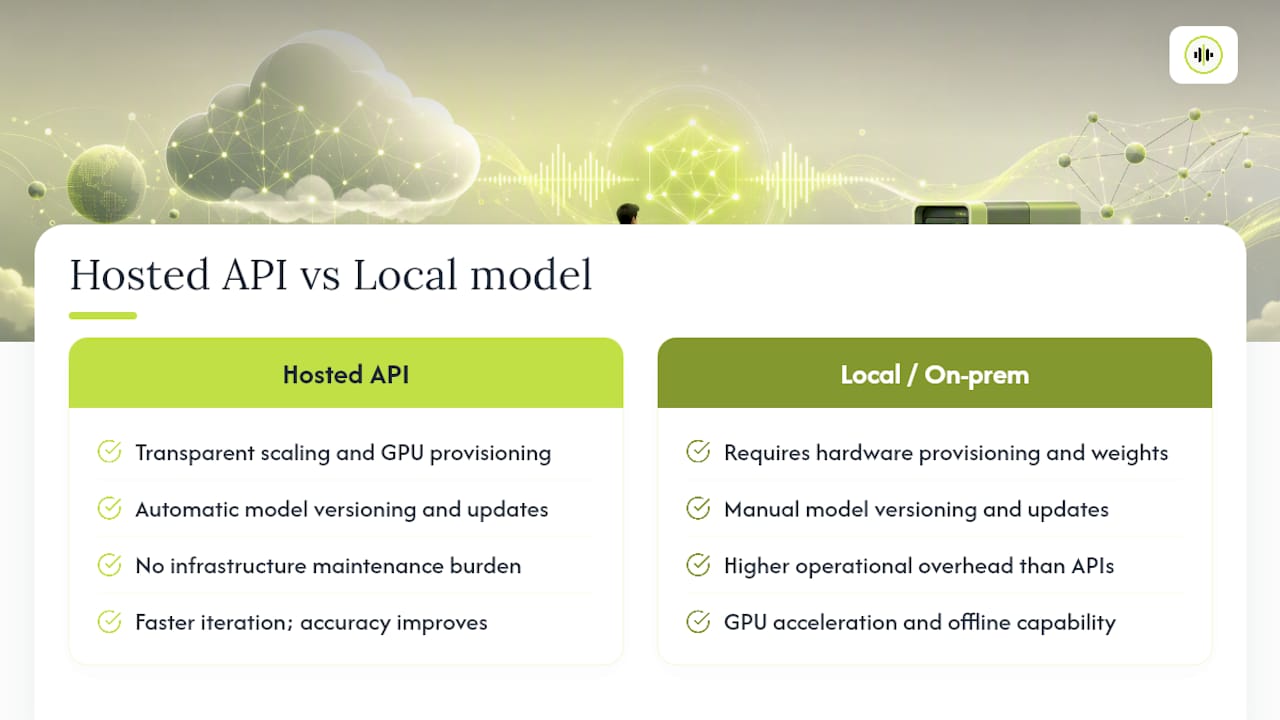
Hosted transcription APIs handle infrastructure scaling, model versioning, and GPU provisioning transparently. Local bindings like whisper-cpp-node offer GPU acceleration and offline capability, but they require additional operational effort: managing model weights, handling hardware provisioning, and absorbing the latency penalty of large-batch CPU inference. For most teams, the operational overhead of maintaining a local model pipeline exceeds the cost savings from avoiding API fees, particularly at moderate audio volumes.
The cases where local or on-premises models genuinely win are narrow but real: audio containing highly sensitive data that cannot leave the organization’s network, environments with no reliable internet connectivity, and fixed-cost deployments where audio volume is high enough that per-second API billing exceeds the amortized cost of dedicated hardware. Outside those scenarios, a hosted API with flexible model selection delivers faster iteration, automatic accuracy improvements as models are updated, and no infrastructure maintenance burden.
OpenTranscription covers every pattern in this guide
OpenTranscription provides a unified API surface for all the flows described above: file-based batch transcription, real-time WebSocket streaming, speaker diarization, and output in JSON, SRT, VTT, and plain text across 105+ languages. A single SDK install covers every pattern without switching providers or managing multiple credentials.
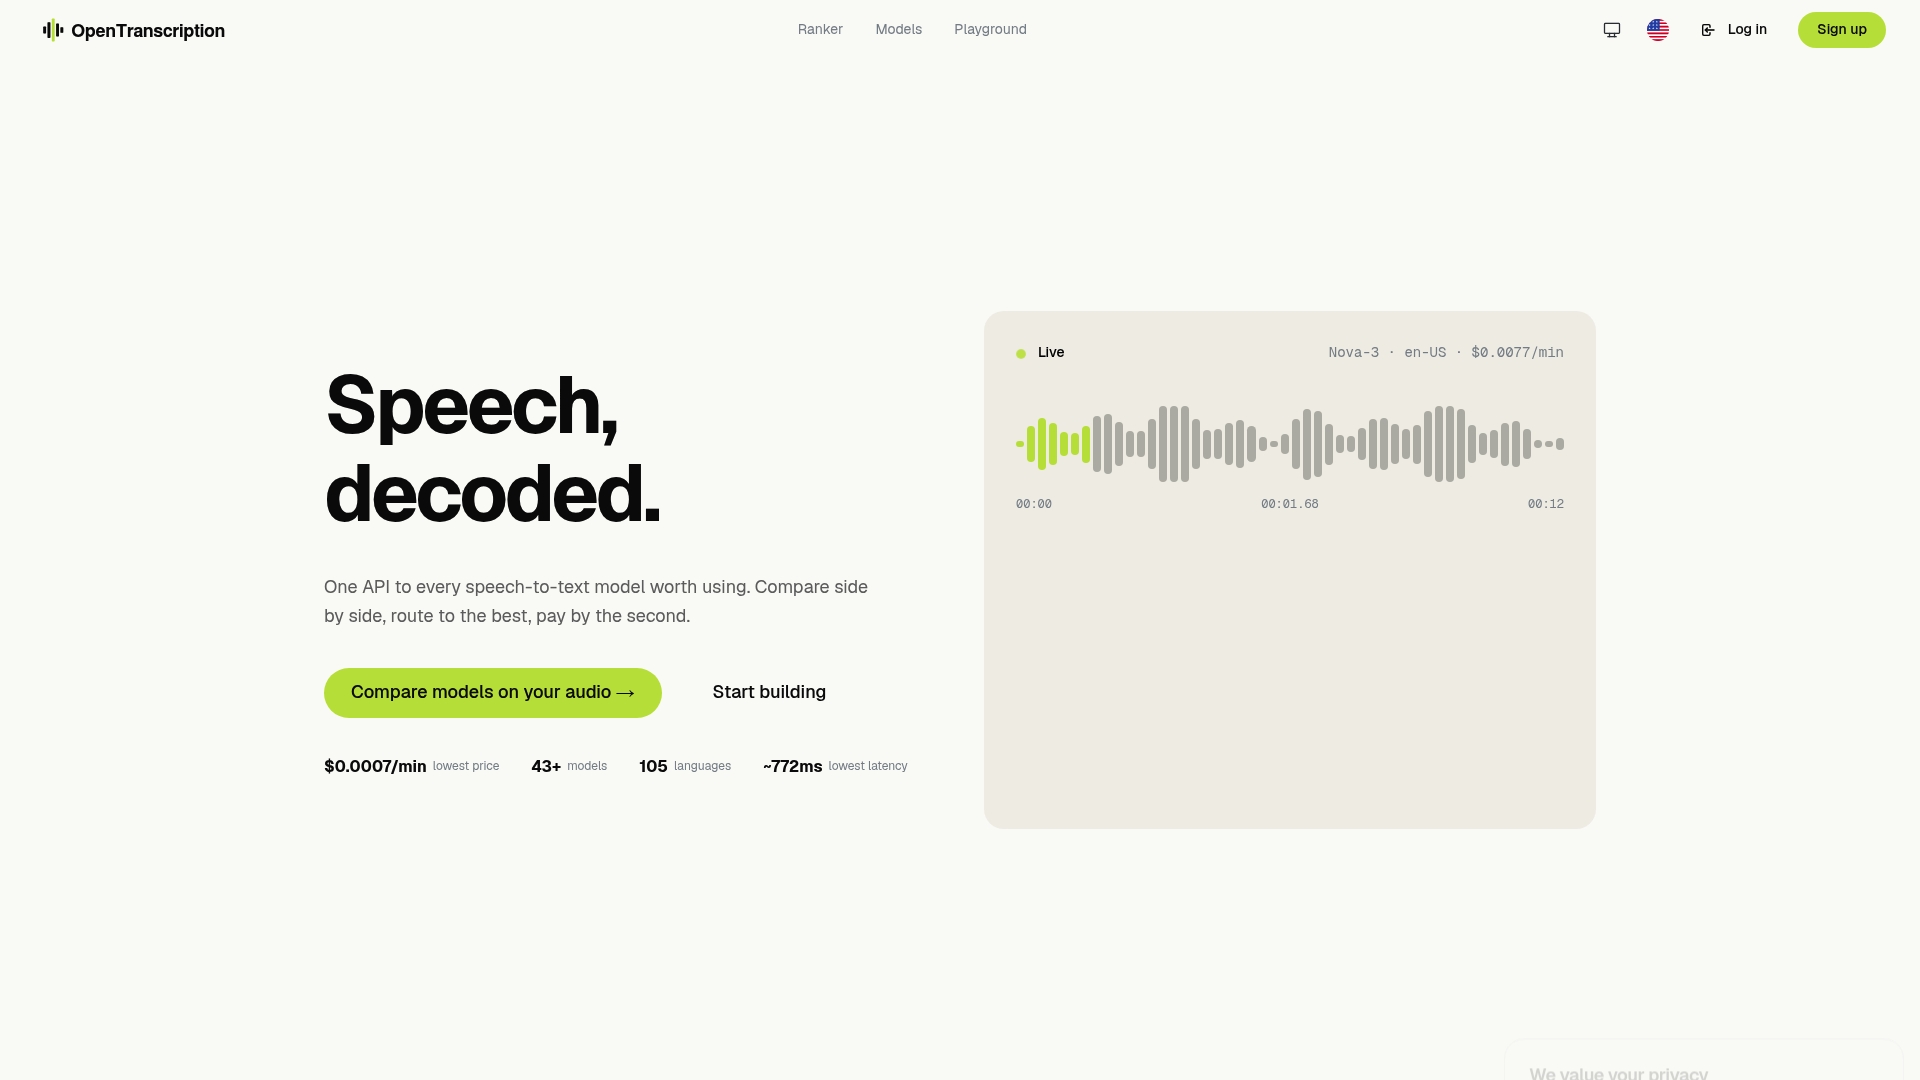
npm install @opentranscription/sdk
The platform’s model catalog publishes live benchmark data for 40+ models, so you can filter by WER, latency, and cost per second before writing a line of production code. Billing is per second of audio processed with no subscription commitment, which means you pay only for what you transcribe. For real-time use cases, the realtime model rankings surface the lowest-latency options by language and noise condition. Start by creating an account at Opentranscription, grab your API key, and run the file-upload example from this guide against your own audio in under five minutes.
Sources
FAQ
What is the best transcription API for Node.js?
OpenTranscription is a strong choice for Node.js developers because it provides a unified SDK covering file-based and streaming transcription, speaker diarization, and 40+ benchmarked models selectable by cost, latency, and accuracy. The pay-per-second billing with no subscription makes it practical for both low-volume prototypes and high-volume production workloads.
Is there a free speech-to-text API for Node.js?
Several providers offer free tiers with monthly audio-minute caps, and local bindings like @valoric/whisper-node run entirely on your own hardware at no API cost. Free hosted tiers typically impose rate limits and lack production SLAs, so they suit evaluation but not sustained production traffic.
How do you keep API keys secure in a Node.js transcription app?
Store keys in environment variables loaded via dotenv locally and via a secrets manager (AWS Secrets Manager, HashiCorp Vault) in production. For browser-facing streaming, generate short-lived tokens from a secure Node.js endpoint rather than exposing the primary API key client-side.
Can ChatGPT transcribe audio to text?
OpenAI’s Whisper model, accessible via the OpenAI API’s audio/transcriptions endpoint, transcribes audio to text and is callable from Node.js. It is not the same as ChatGPT’s conversational interface, though ChatGPT can process audio attachments in some configurations. For production Node.js integrations, calling the transcription API directly gives more control over response format, timestamps, and model selection.
What audio format gives the best transcription accuracy?
16 kHz mono PCM WAV is the baseline recommended format for most speech recognition models, as noted in MDN’s audio format documentation. Lossless formats (WAV, FLAC) avoid compression artifacts that can degrade accuracy, particularly for low-bitrate or noisy recordings.
Recommended
- Compare & Benchmark Transcription Models - OpenTranscription
- Compare & Benchmark Transcription Models - OpenTranscription
- ElevenLabs Scribe v2: a top-tier transcription product built on an undisclosed model · Signal
- Amazon Transcribe Medical: what AWS actually ships, and what it won’t tell you · Signal